Return to the RS Dipole main page.
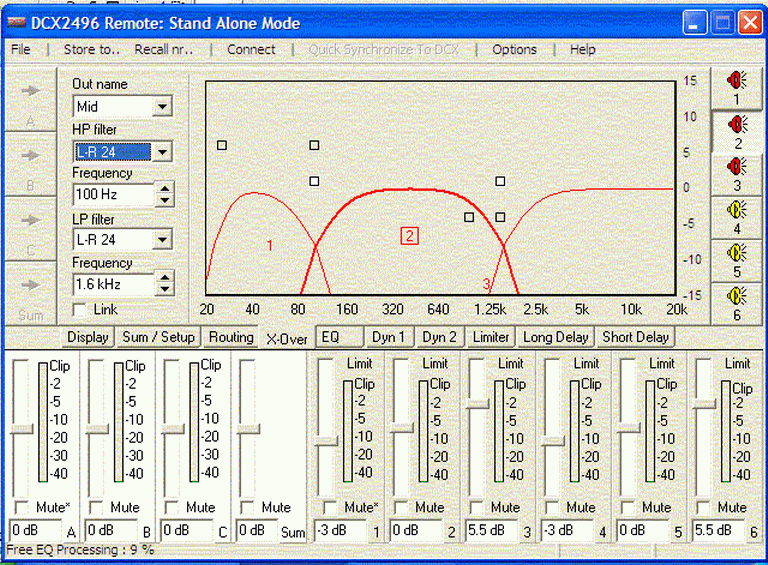
Here are the settings for the RS dipole crossover. If you are not using a PC to set it up then you have to translate the information into the manual controls on the crossover. It's not that hard, you just have to play with it and see how to do it. Click on a thumb to see the settings.
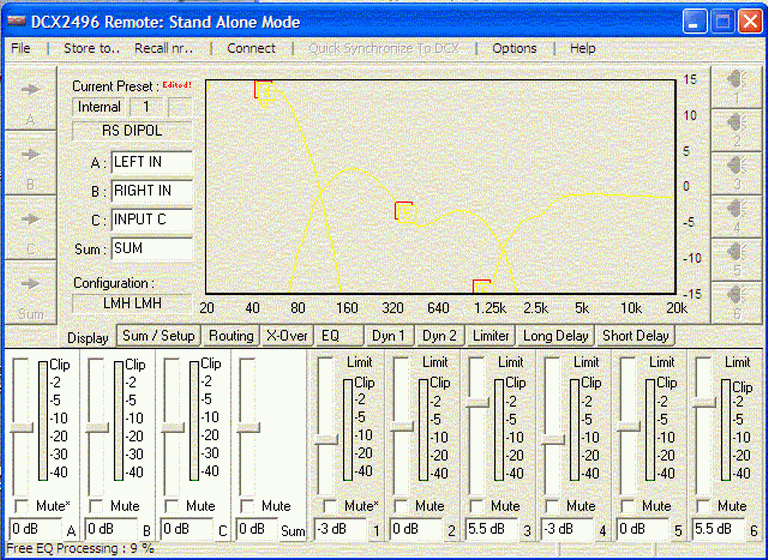
The “Display” tab shows you basically what the crossover transfer functions should look like when done. The yellow is a bit hard to see.
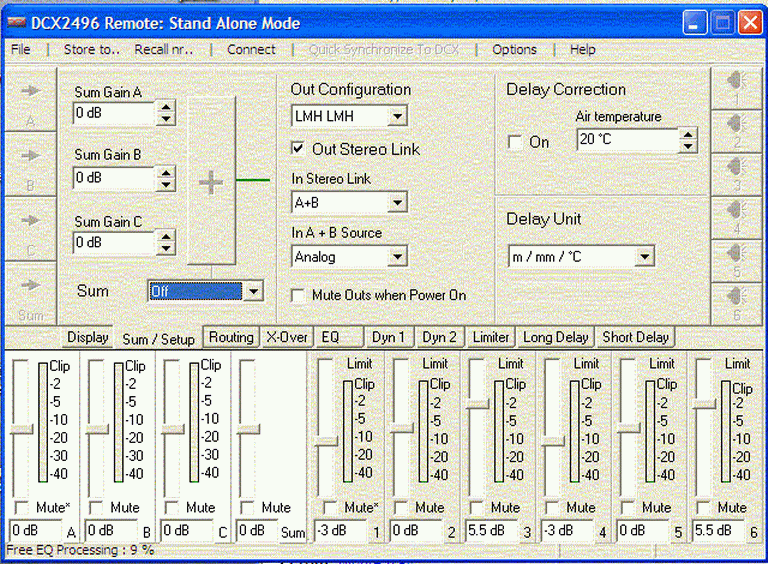
Use the Sum/Setup tab to set the configuration. In this case, LMH LMH etc. The screen should look like the settings above. Note the slider positions at the bottom.
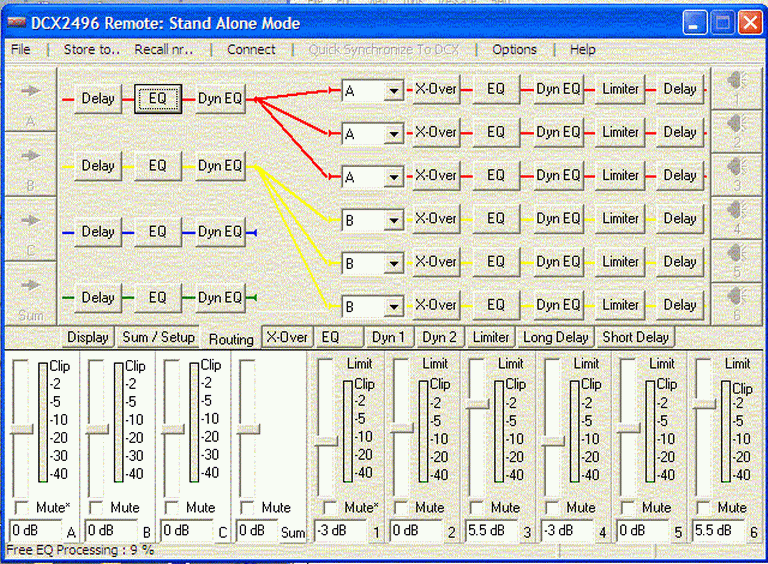
Routing assigns which input channel goes where. In this case A for channel 1, 2, 3 and B for channel 4, 5, 6.
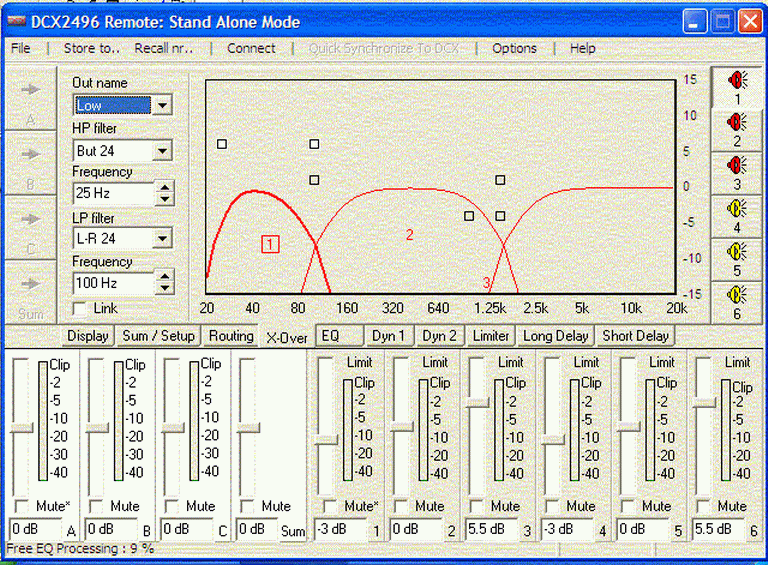
Woofer crossover settings.
Midrange crossover settings.
Tweeter crossover settings.
From the EQ tab, you will set a number of corrections. Here, the ground plane EQ is set to correct for the woofers close proximity to the floor. Note that “A” is selected in the upper left but because they are linked, the same EQ will apply to B.
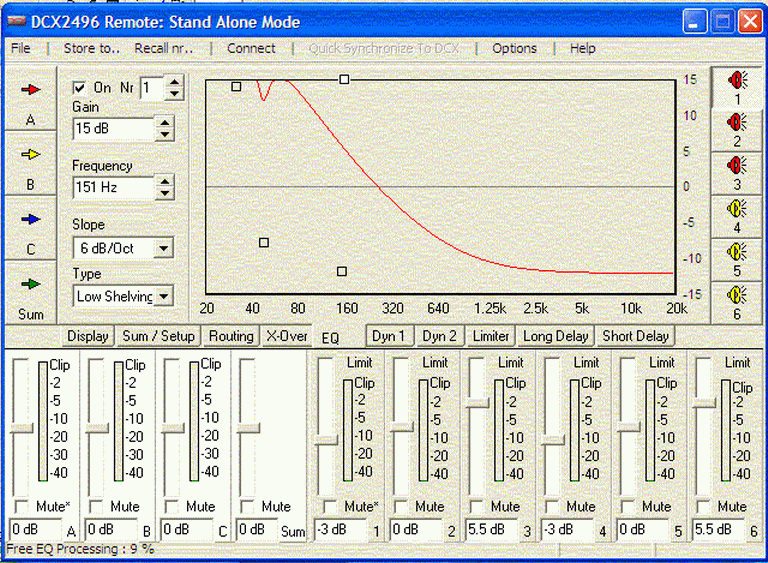
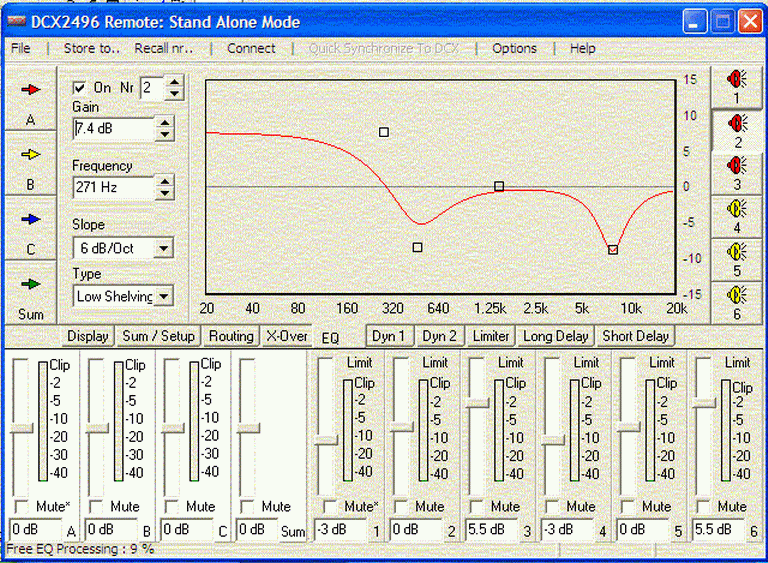
Note in the upper left where it says “Nr” and there is a 1 after it with up/down arrows. This is the first filter on output channel # 1 which is a woofer output. The gain is set to 15 db, frequency 151 Hz, 6 db/oct, Low shelving. On the crossover itself all this has to be dialed in using the on screen display. You select the first filter, tell it what type it is like low shelf, etc and all the parameters.

2nd filter in woofer section.

3rd filter in woofer section.
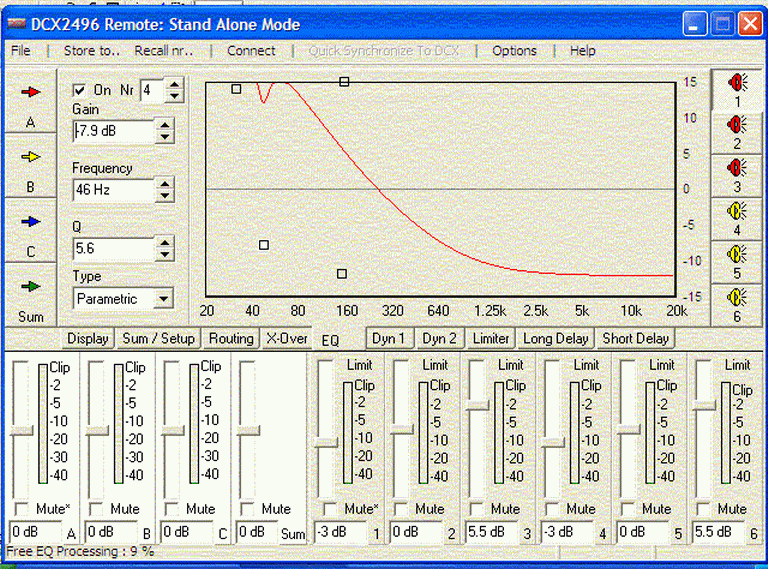
4th filter in woofer section.

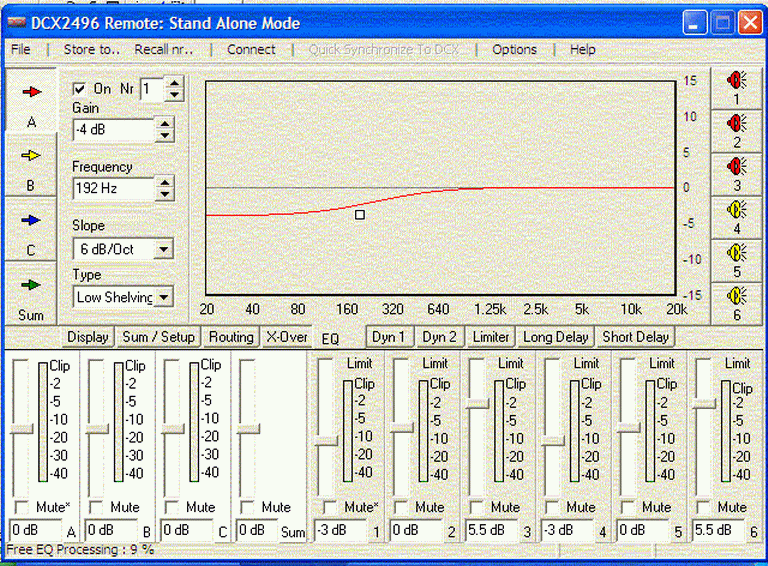
First filter in midrange channel.
2nd filter in midrange channel.
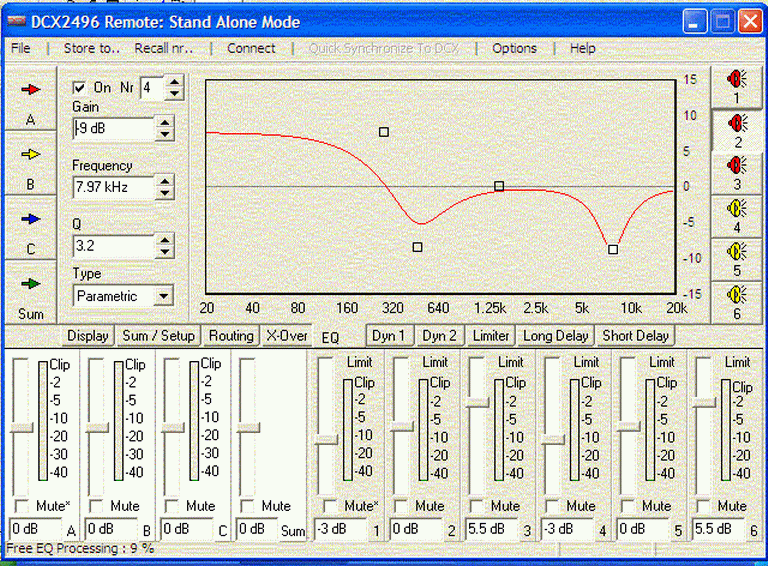
3rd filter in midrange channel. (It displays Nr 4 only because I had left an unused one on # 3.)
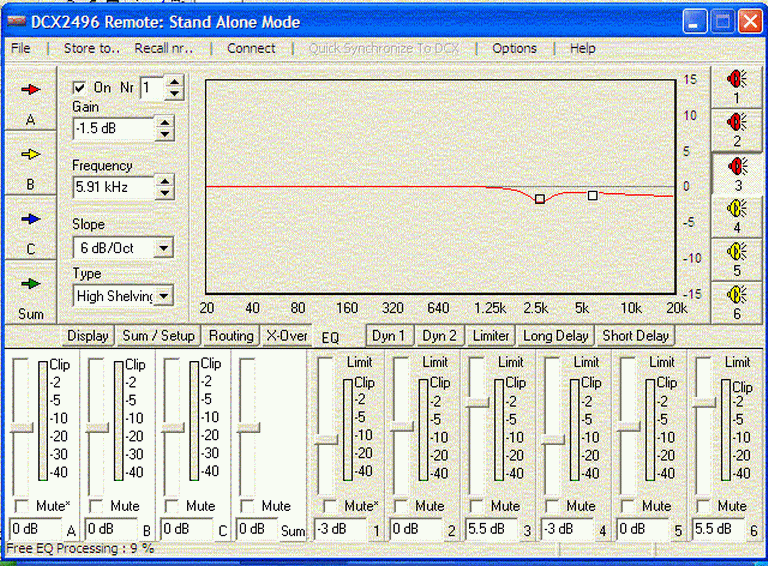
1st filter in tweeter section.
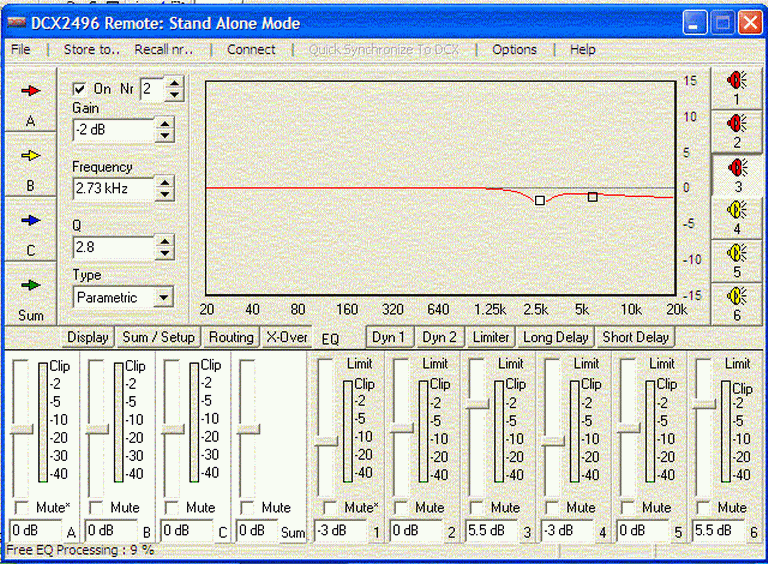
2nd filter in tweeter section.
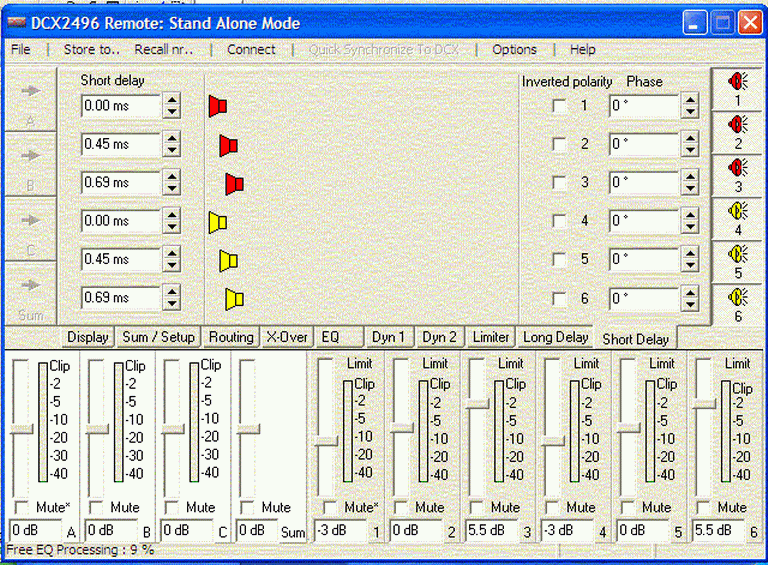
Delays for tweeter and midrange.
If you are new to the Behringer crossover it just takes a little playing with to learn to use it. You will want to make sure you have the latest firmware loaded onto it because some of the older versions will not have enough capacity to accomplish this crossover. You can down load and install the firmware from the Behringer web site.
On the crossover, you select the section you want to change. For example you would select the A button on the far left to put in the EQ for the ground plane. Make sure you are changing the EQ and not the dynamic EQ. The dynamic EQ is not used. Once you are on a selection like A you can go through the page select to find the things you want to change like the gain, crossover settings, EQ settings etc. Also note that when you select # 1 that # 4 will flash because these are tied together. As you make your EQ settings on 1 the changes will also effect 4. This way left and right are done the same together at the same time.
Once done, make sure you save it. It can then be backed up on a flash card. Also, before making tweaks, save it again under a new file name. This way you can toggle between the original starting version and your tweaked